A field of shingles is good at exactly one job: shedding water that runs straight down a slope. The trouble starts everywhere the water can't simply keep going down — where the roof runs into a wall, a chimney, a skylight, or another slope, and everywhere it has to pass a hole in the deck. At each of those interruptions the shingle stops and a piece of metal takes over. That metal is the flashing, and it is where the large majority of the leaks we chase actually begin.
This is the page where we show our work, because flashing is the part of a roof that separates a crew that understands water from a crew that owns a caulk gun. Below is how each flashing detail is supposed to be built, exactly how each one fails, and why the honest quote to fix it is bigger than the quick one. Flashing is also the first of the seven systems our Roof Health Assessment works through — because a single dead flashing detail lets water in whether the rest of the roof is pristine or worn.
Why flashing is the leak, not the shingle
When we take a leak call and climb into the attic, the water trail almost never leads back to a hole in the middle of a slope. It leads to a wall line, a chimney corner, a valley, or a pipe penetration. The shingle field on most of these roofs is fine — sometimes with ten years of life left — and the homeowner has already been quoted a full replacement by someone who couldn't read the water trail or didn't want to.
The reason is physical. A shingle field is a series of overlaps designed for one direction of flow: down. The moment water is forced to turn — to run along a wall, funnel two slopes into one valley, or get around a chimney — the overlap logic of the field no longer protects it, and a flashing detail has to take over. Each transition is a designed joint, and a joint is only as good as the metal and lap sequence built into it.
So a leak repair that actually holds is a flashing repair far more often than not. The roof leak repair that fails within a season is the one that treated a flashing failure as a shingle problem — a new shingle over a bad wall detail, or a bead of caulk where a piece of metal belonged. A roof is only as dry as its worst joint, which is why we grade the flashing first.
Step flashing and counterflashing: two pieces, two jobs
Where a roof meets a sidewall, the flashing is not one long bent strip of metal. It is a stack of individual L-shaped pieces — step flashing — each one bent over a single shingle course and lapped by the piece above it, so the assembly steps its way up the wall course by course. Each piece tucks under the shingle on the roof side and runs up behind the wall covering on the wall side, so water coming down the wall is directed back out onto the roof surface every time, never behind it.
The classic hack — and we find it constantly — is a single continuous strip of bent aluminum run up the whole wall in place of the woven step pieces, with caulk along the top edge. It looks tidy from the driveway. It fails because there is no course-by-course overlap: any water that gets behind that top edge, and over a few winters it does, has an uninterrupted channel straight down behind the siding.
Step flashing is only half the detail. On a masonry wall or chimney, a second piece — counterflashing — is set into a groove cut into the mortar joint (a reglet) and folded down over the top of the step flashing beneath it. The point of that overlap is that a physical lap of metal over metal does the weatherproofing, not a bead of sealant: sealant is allowed to fail, and the lap still sheds water. When counterflashing is instead surface-mounted and tarred to the brick, the tar is the only thing holding water out — and tar has a service life measured in a handful of New Jersey freeze-thaw winters.
- Step flashing woven under each shingle course and up behind the wall covering
- Counterflashing cut into a mortar reglet and lapped over the step or base flashing
- The metal-over-metal lap doing the sealing, with sealant only as a backup
- Headwall (apron) flashing where a slope dead-ends into a wall above it
- Flashing continuity carried through above dormers and additions, not stopped short
Kickout flashing: the missing piece that rots walls
At the bottom of a roof-wall intersection — where the step flashing ends and the roof edge meets the wall — one more piece belongs: a kickout, or diverter. It catches the water coming down the wall-side channel and throws it out, away from the wall and into the gutter. It is the single most commonly omitted piece of flashing in the trade, skipped because the wall covering usually goes on after the roofer has left.
When the kickout is missing, the runoff from the entire slope above dumps behind the siding at that corner instead of into the gutter, soaking the sheathing, housewrap, and framing entirely out of sight. The homeowner sees a stain appear on the interior wall, usually near a window, and calls it a window leak. The window gets re-caulked, then replaced, and the stain comes back — because the water was never coming from the window. It was coming from a small piece of metal that was never installed, and by the time it's diagnosed the sheathing behind the siding is often rotted through.
The absence of a kickout is one of the findings we flag hardest on an inspection, because the damage compounds silently for years before anyone connects it to the roof. Retrofitting one means pulling back the siding and the bottom shingle courses at that corner, installing the diverter, and integrating it with both the step flashing above and the barrier behind the wall so the water is handed cleanly into the gutter.
Valleys and roof-edge metal
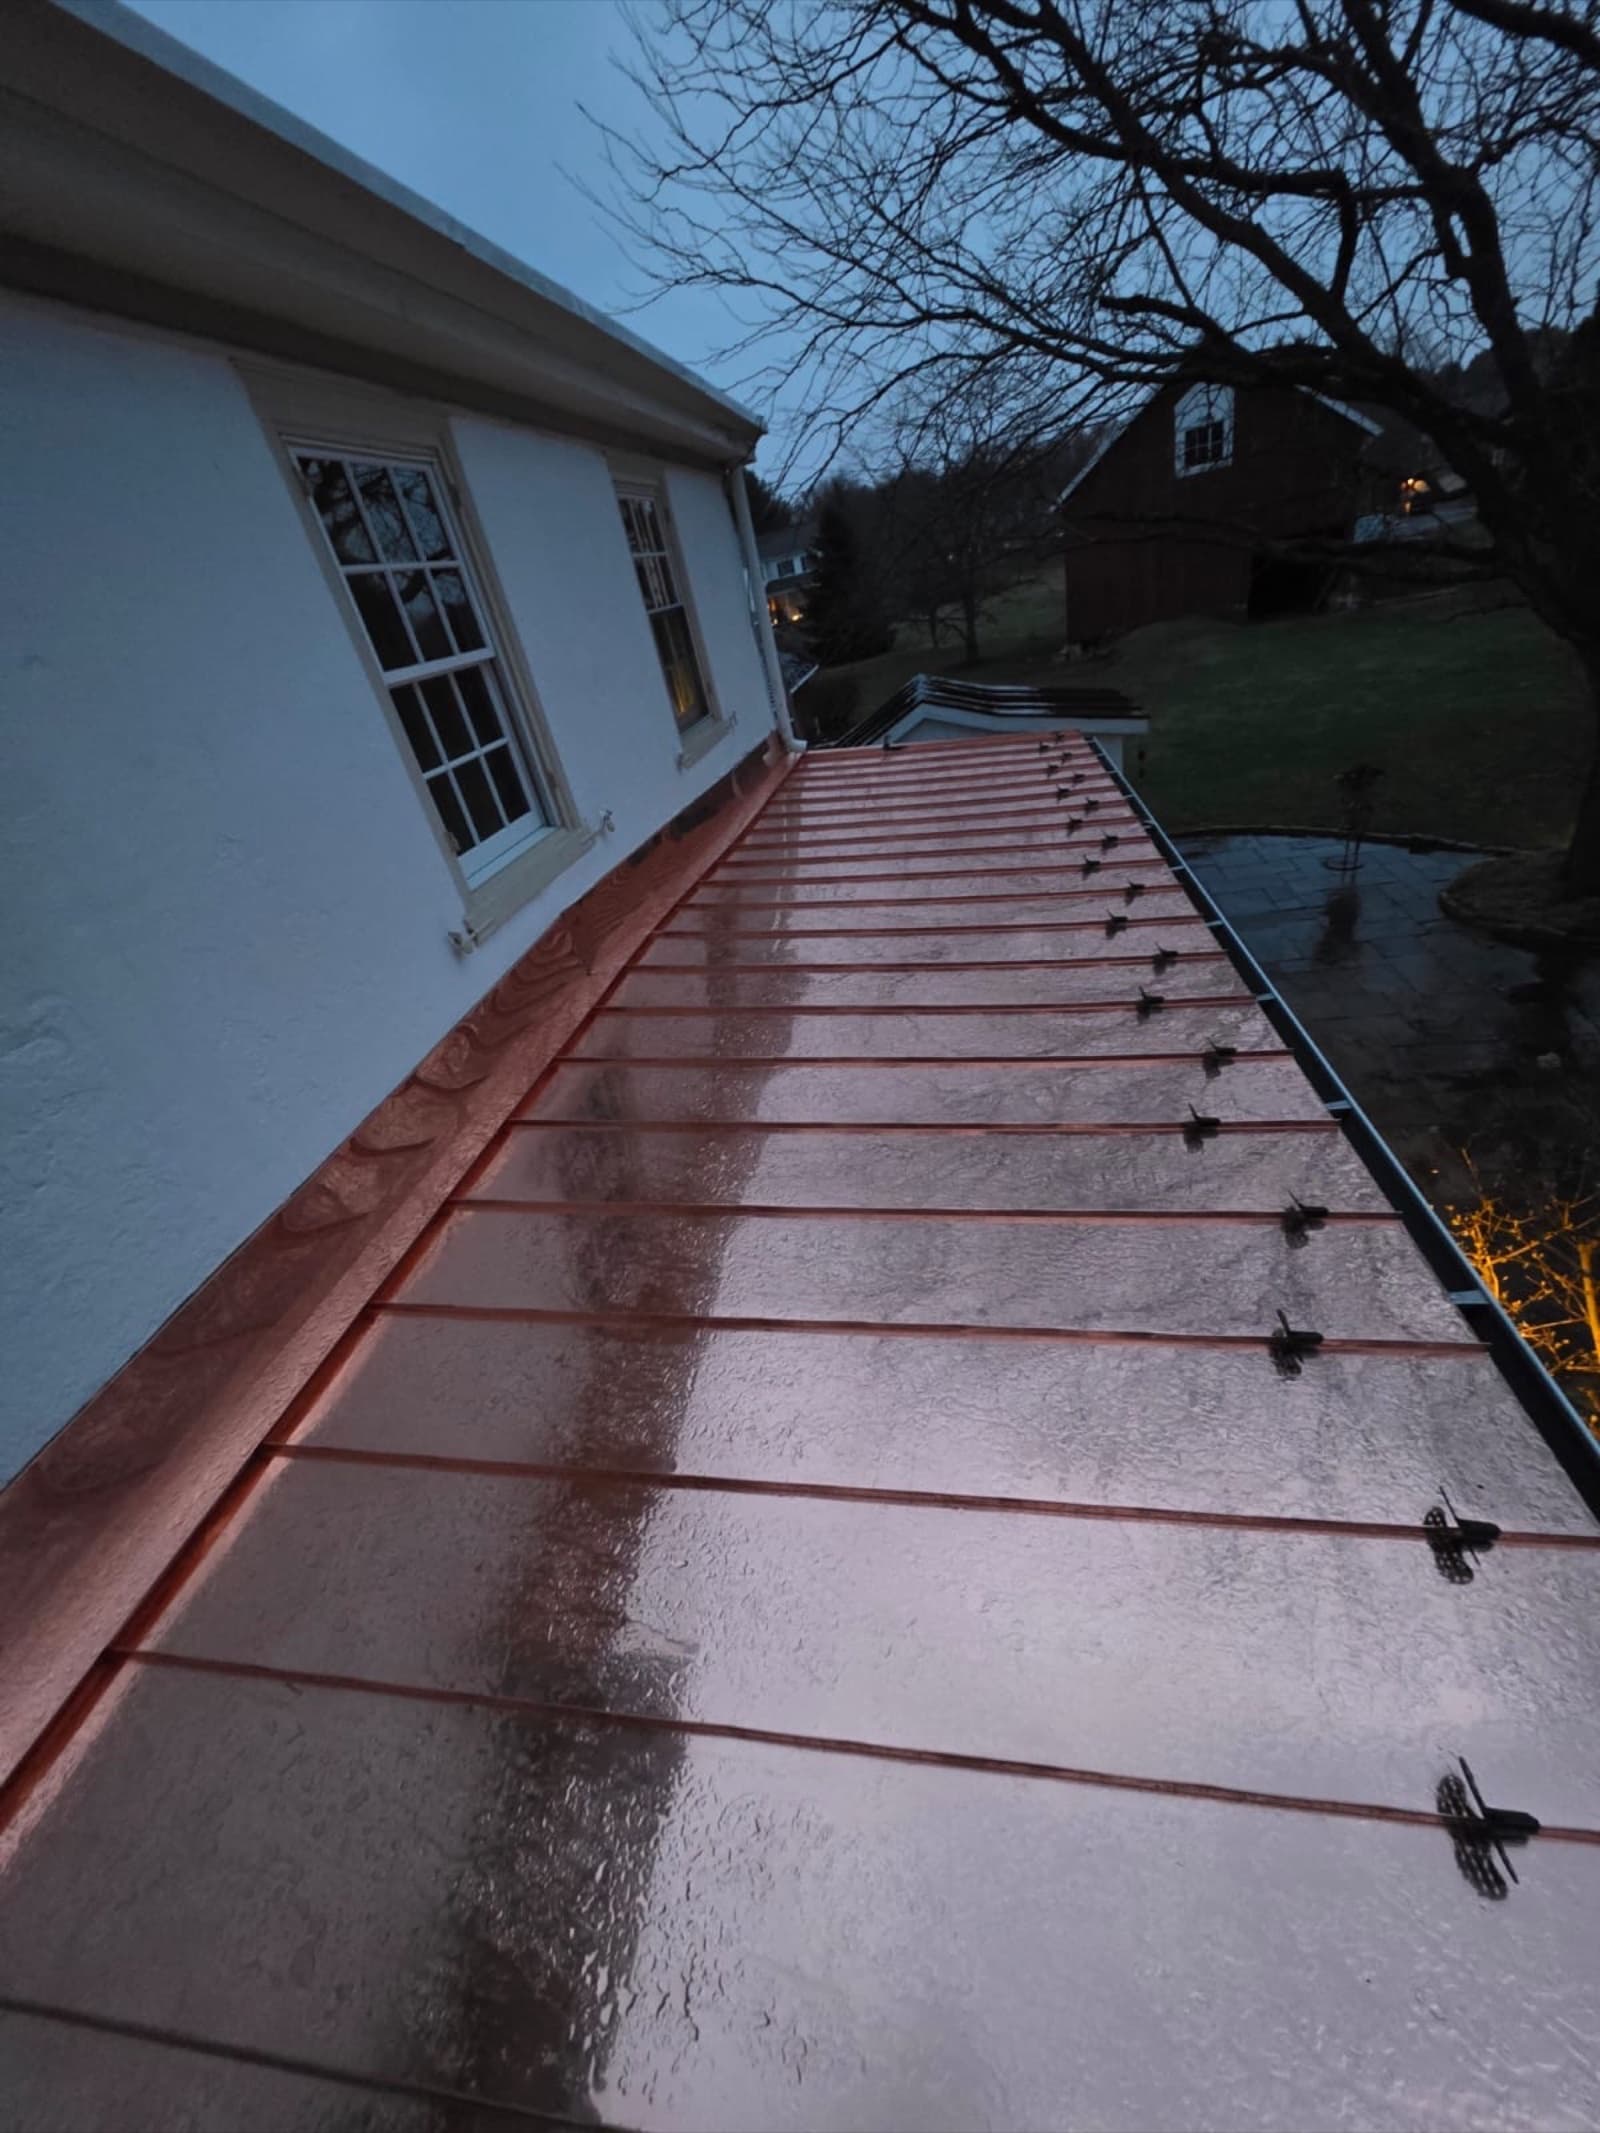
A valley is where two slopes meet and the combined water of both pours down a single line — the highest-volume water path on the whole roof. There are three ways to build one. An open-metal valley runs a wide W- or V-profile metal channel down the centerline (aluminum, or copper on higher-end work) with the shingles cut back so water runs on bare metal. A closed-cut valley carries one slope's shingles through the valley and laps the other slope's over them, trimmed to a clean line. A woven valley interlaces both slopes' shingles through the center.
In a location with trees over the roof — and most homes we work on in Clifton, Montclair, Wayne, and the surrounding Bergen, Passaic, Essex, Hudson, and Morris county towns have some canopy — a woven valley is the wrong choice. The interlaced shingles trap leaves and needles in the exact channel that carries the most water. The debris dams, water backs up under the laps, and it travels sideways under the field until it finds a nail hole or a seam. An open-metal valley in the same spot sheds that debris and moves the volume across a smooth surface, so it's usually what goes back in when we rebuild a leaking valley.
The roof edges have their own metal. Drip edge — the L-shaped strip that runs the eaves and rakes — has a specific over/under relationship with the underlayment that most quick repairs get backwards. At the eaves the drip edge goes under the underlayment, so water shedding down the felt runs out over the metal and drips clear of the fascia. At the rakes it goes over the underlayment, so wind-driven rain can't lift the edge and get under it. Reverse that relationship and the edge wicks water back onto the fascia and into the sheathing — a slow rot that starts at the very perimeter of the roof.
Penetrations: pipe boots, skylight curbs, and chimney crickets
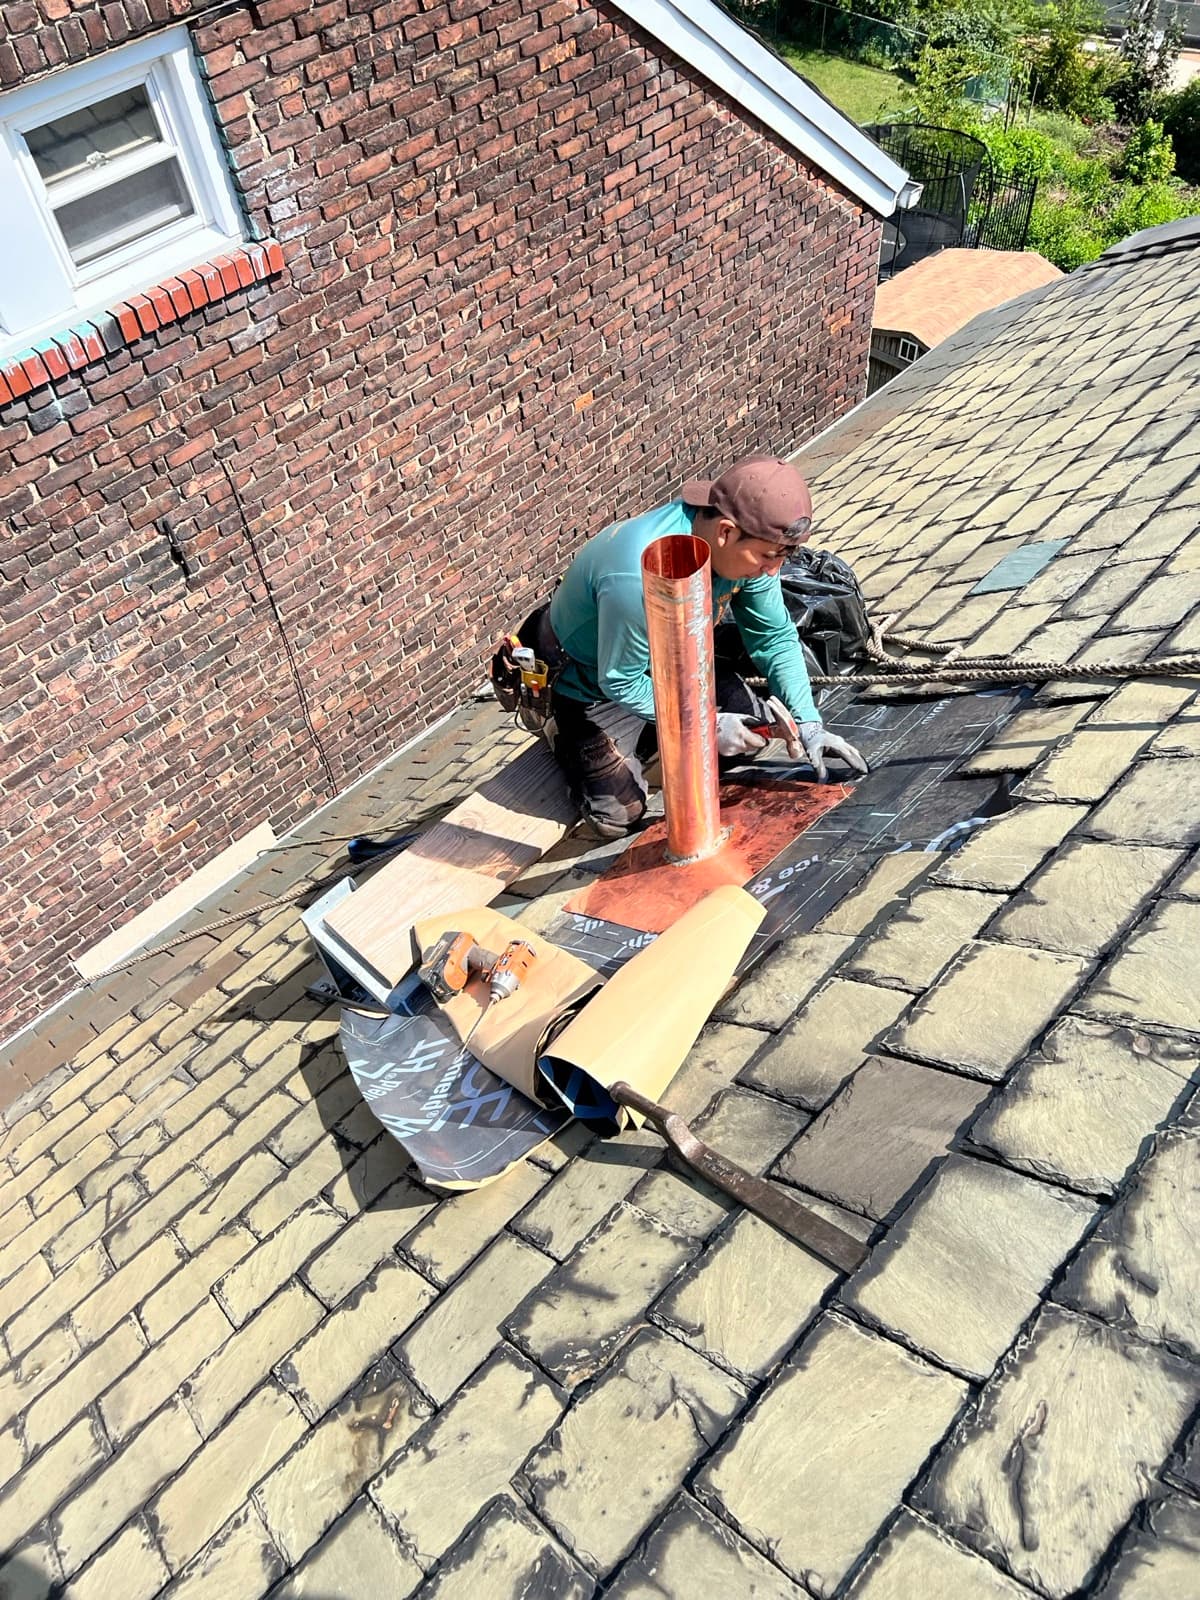
Every pipe, vent, and skylight that punches through the deck is a hole that has to be sealed around, and each has its own way of failing. The most common single failure on the whole roof is the plumbing vent pipe boot: a metal base flange with an EPDM rubber collar that stretches over the pipe. The rubber is the weak link — UV from the sun hardens and splits the collar years before the surrounding shingle field shows any real wear. We find cracked boot collars on roofs with fifteen good years of shingle left. The fix is a new boot, or one with a metal storm collar over the rubber, not a smear of sealant across the crack.
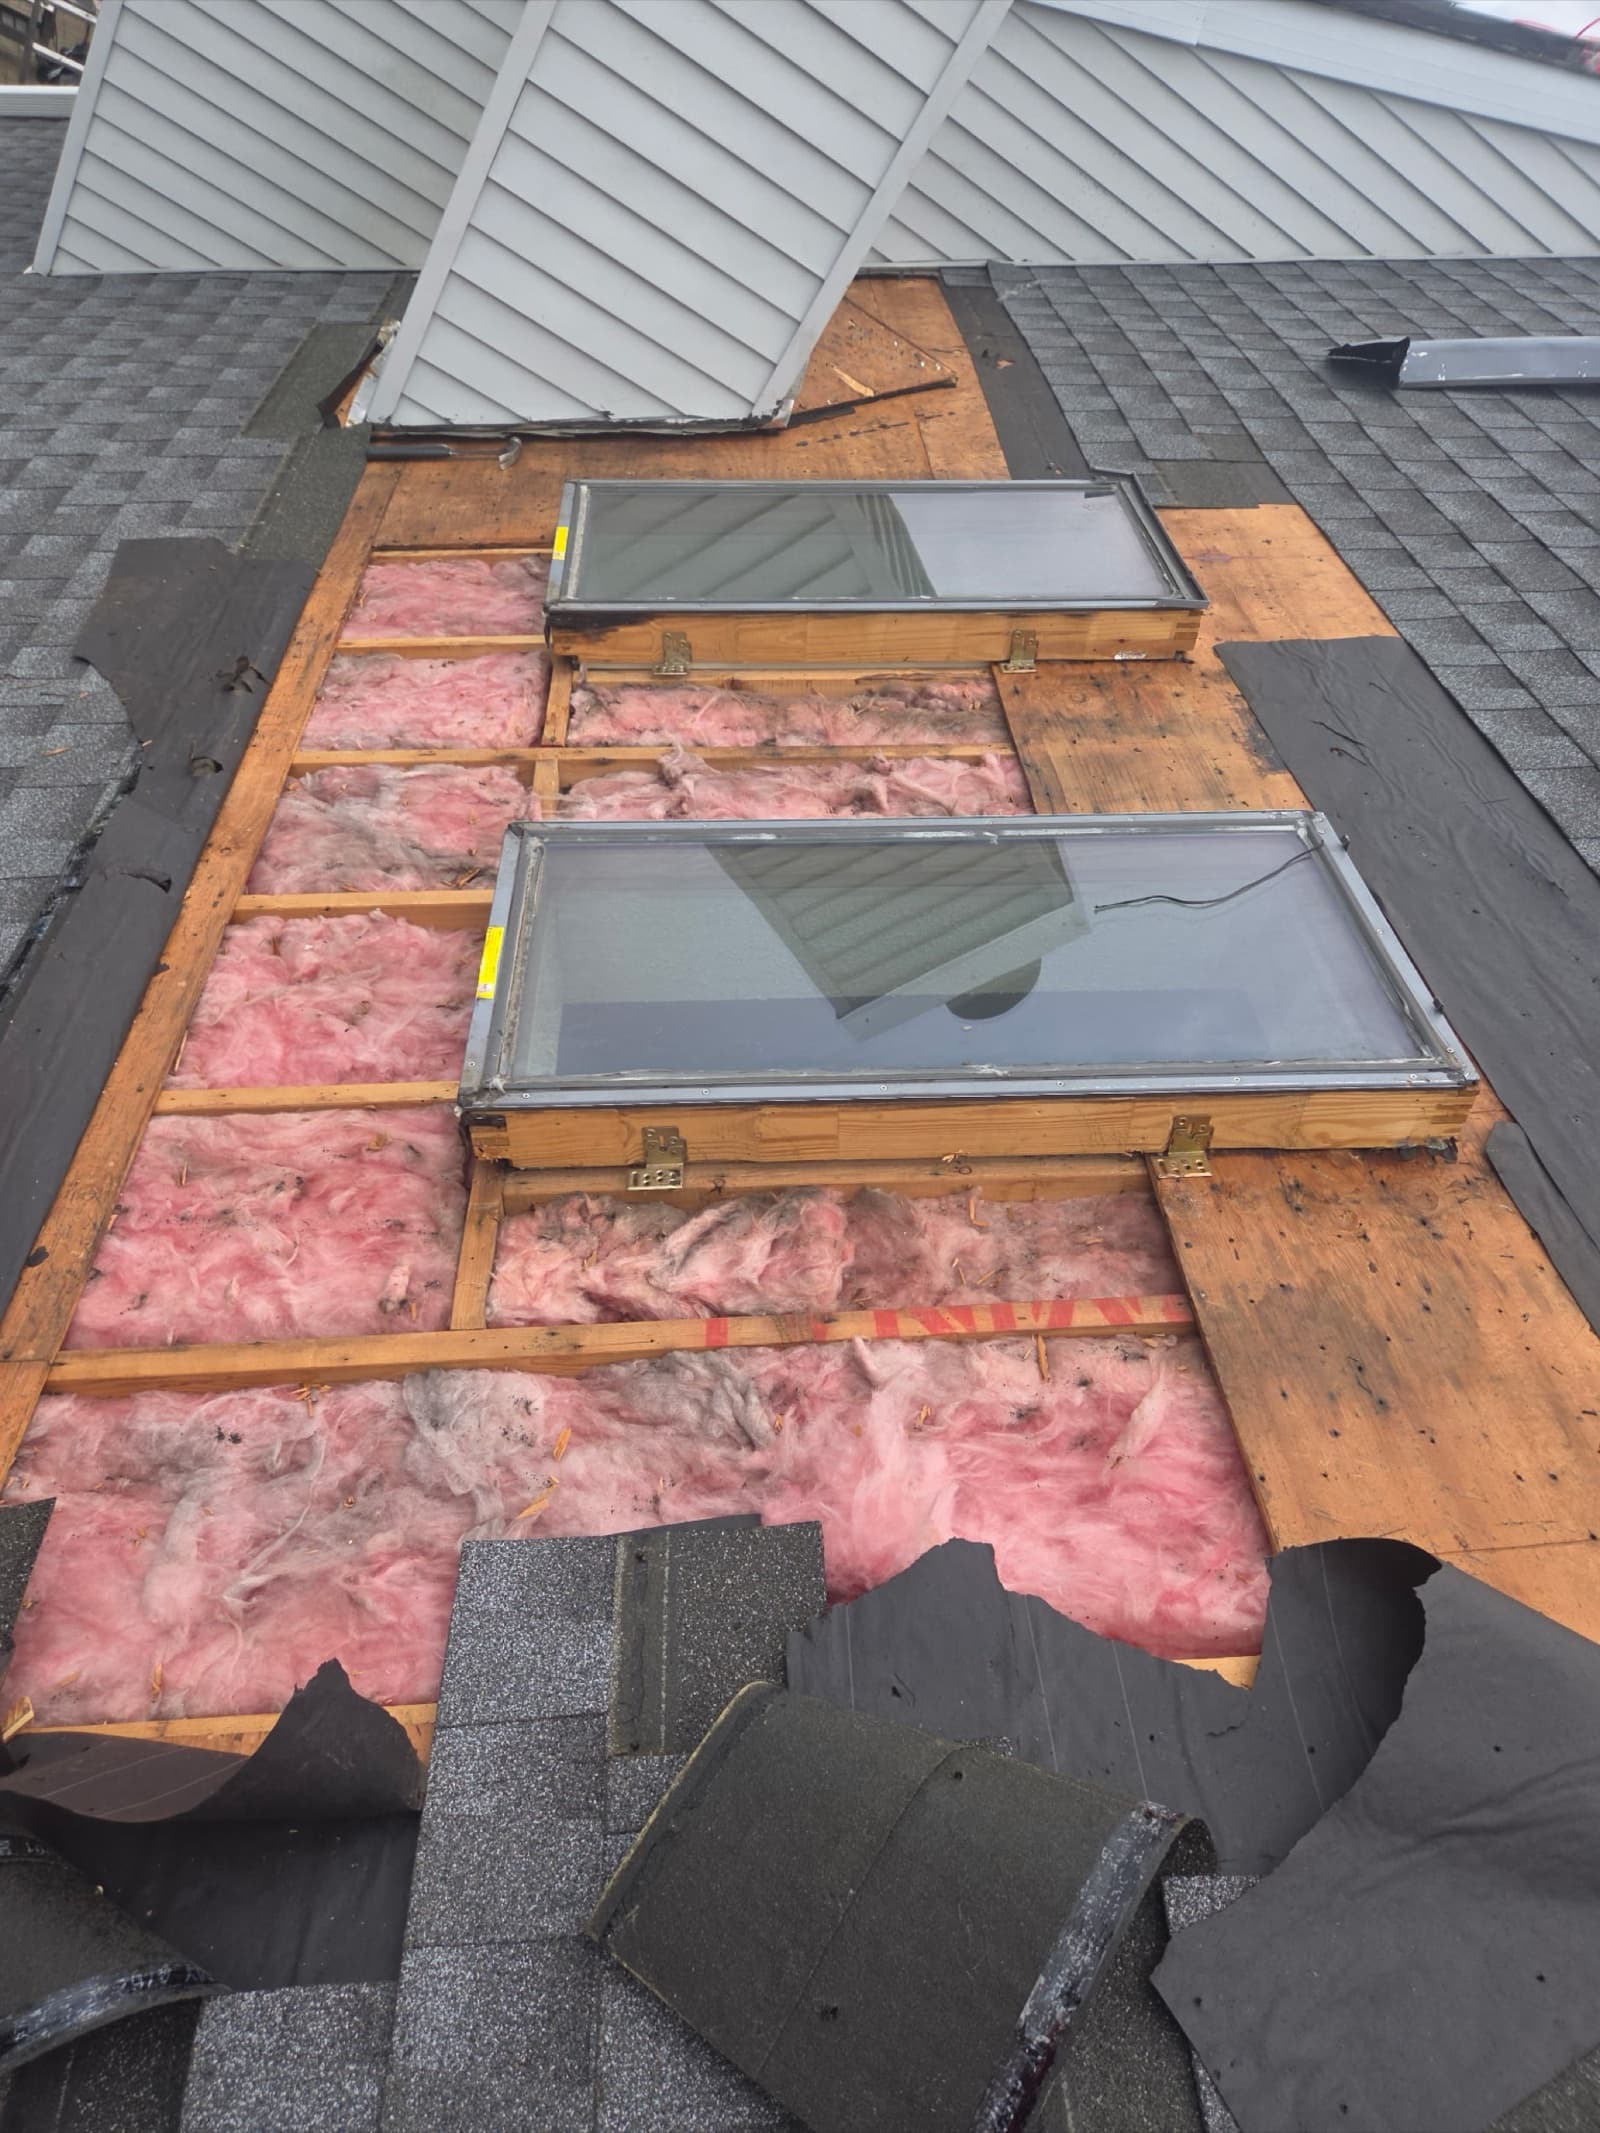
A skylight is flashed with a kit specific to its curb — a sill piece at the bottom, step pieces up the sides, and a head flashing at the top — each integrated into the shingle courses the same way a sidewall is. A skylight that leaks is almost always a flashing-integration failure or a failed seal at a corner, not a failure of the glass unit itself, which is why swapping the skylight without rebuilding the flashing usually leaves the leak in place. When the water is genuinely coming from the glass seal or the frame, that's skylight leak repair territory.
Behind a wide chimney — more than a couple of feet across on the up-slope face — code and good practice call for a cricket, or saddle: a small peaked structure framed behind the chimney that splits the water and diverts it around both sides. Without one, the flat back wall acts as a dam, holding snowmelt, leaves, and ice against the masonry and flashing until the water finds a way in. Chimney flashing and crickets are their own detail-heavy repair, covered in full on the chimney repair page.
Why caulk is a symptom, and why the honest quote is bigger
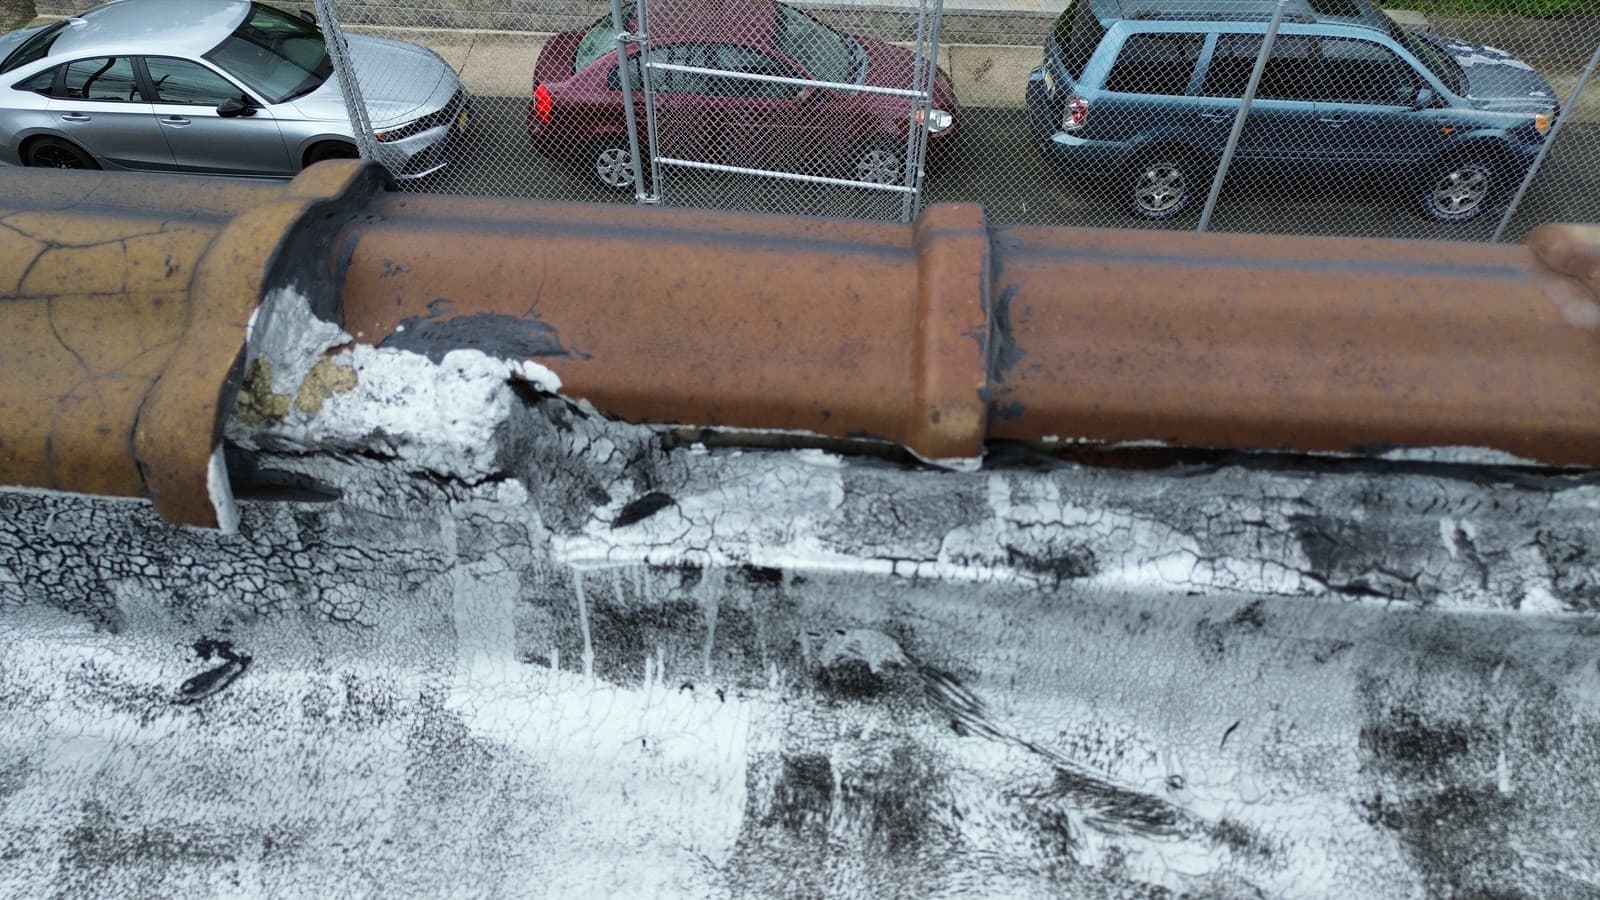
Sealant has exactly one legitimate role in a flashing detail: it is the last line of defense, backing up a lap of metal that is already shedding the water on its own. It is never the water barrier. A properly built flashing keeps water out even if you scraped every bit of caulk off it. So when we climb a roof and find a continuous bead of caulk or a smear of roof tar run along a wall line, a chimney, or a valley, we read it as a diagnosis: this flashing was never built to shed water on its own, and someone has been relying on sealant to do the job the metal should be doing.
Tar and sealant also fail on a schedule. They get brittle in the cold, oxidize under UV, and pull away from the surfaces they were bridging. A flashing repair that is really just a fresh bead of sealant buys a season, maybe two, and then the leak is back — often worse, because the failed sealant now traps water against the very joint it was meant to protect. A roof with caulk smeared along a wall line is a roof whose flashing was never built right, and fresh caulk doesn't change that.
This is why the honest quote is bigger than the caulk-gun quote. The flashing lives under the shingles and often behind the siding, so reaching it means opening shingle courses along a wall, pulling back siding at a corner, or stripping the shingles around a chimney to cut a fresh reglet — real labor on real material. The crew quoting a fraction of the price is quoting a tube of caulk and a ladder, and you'll pay both, the cheap one first and the real one after the damage spreads. We don't publish one-size-fits-all prices, because the scope depends entirely on what has to come apart to reach the metal; we open it up, show you what's there, and put an itemized number in writing, free.
When You Actually Need This
- A wall stain below a roof-wall corner that keeps coming back after paint
- Water showing up near the chimney after every driving rain
- A bead of caulk smeared along a wall line that has failed again
- A leak traced to a skylight, plumbing vent, or cracked pipe boot
- A recurring leak in a valley where two slopes drain into one line